infographic SpaceX Falcon 9 Downrange Propulsive Landing (No Boostback) ~2 minute read
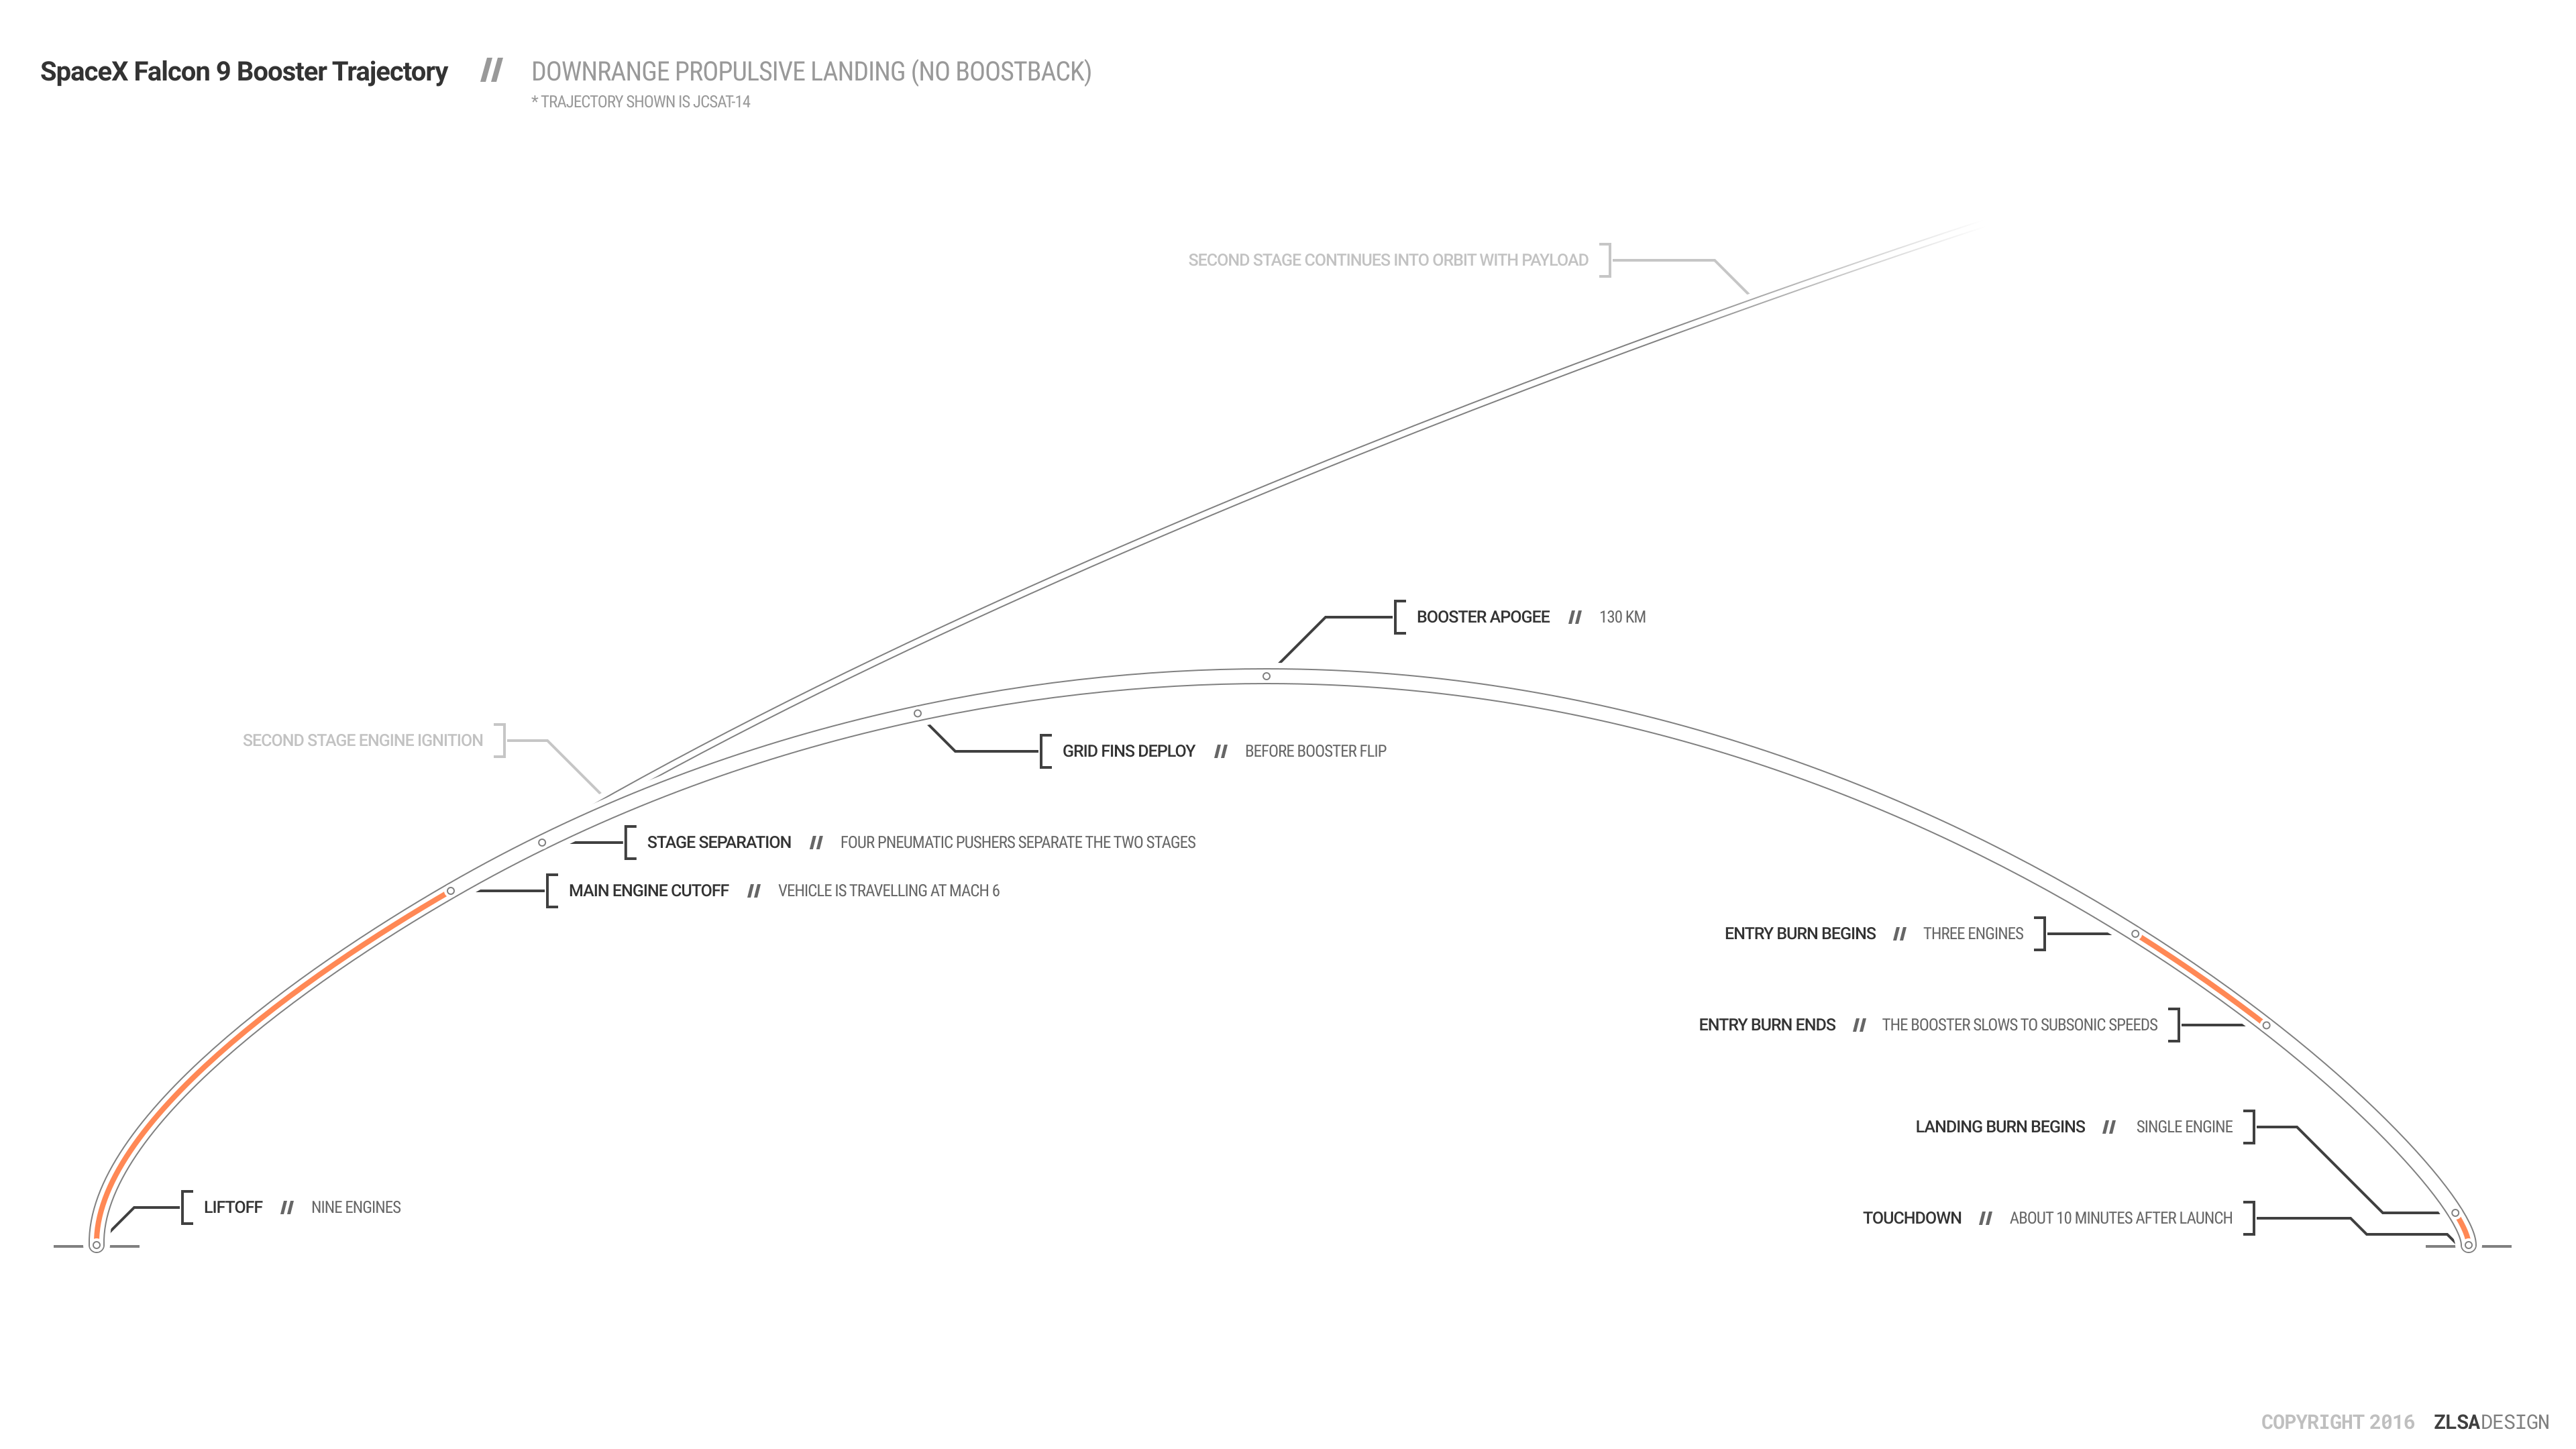
This is the approximate trajectory of the SpaceX Falcon 9 booster during a downrange propulsive landing (i.e. ocean landing) on the ASDS.
Note that this is the trajectory of a booster during a high-performance mission, and does not include a boostback burn. The approximate trajectory of a Falcon 9 landing with a boostback burn can be seen here.
- The Falcon 9 launches, as normal.
- After stage separation, the second stage engine ignites to continue its trip into orbit. The booster stage flips around using its RCS thrusters and deploys its grid fins.
- The Falcon 9 coasts through its apogee on a ballistic trajectory.
- At about 70km in altitude, the booster ignites three of its nine engines for its entry burn. The entry burn ends at about 40km. The entry burn slows down the booster to prevent aerodynamic damage as it begins to pass through the atmosphere.
- The grid fins constantly control the trajectory of the booster, directing it towards the ASDS.
- At about 8km in altitude, the landing burn begins. On most missions, this is done with only the center engine; however, on some high-performance missions, three engines are used instead. Three-engine landing burns use less fuel but are also more risky; however, they allow the booster to provide more velocity to the payload than a single-engine landing burn.
- Seconds before touchdown, the four landing legs deploy.
- The booster touches down on the ASDS; the RCS thrusters at the top of the booster help stabilize the vehicle. Soon afterwards, unused LOx is vented; the RP-1 (kerosene) propellant remains in the tank.
Sources
The trajectory of the SpaceX Falcon 9 booster in this infographic is based on Flight Club’s recreation of the JCSAT-14 launch trajectory.
This infographic was created by Jon Ross. Contact me if you'd like to use it anywhere.