infographic
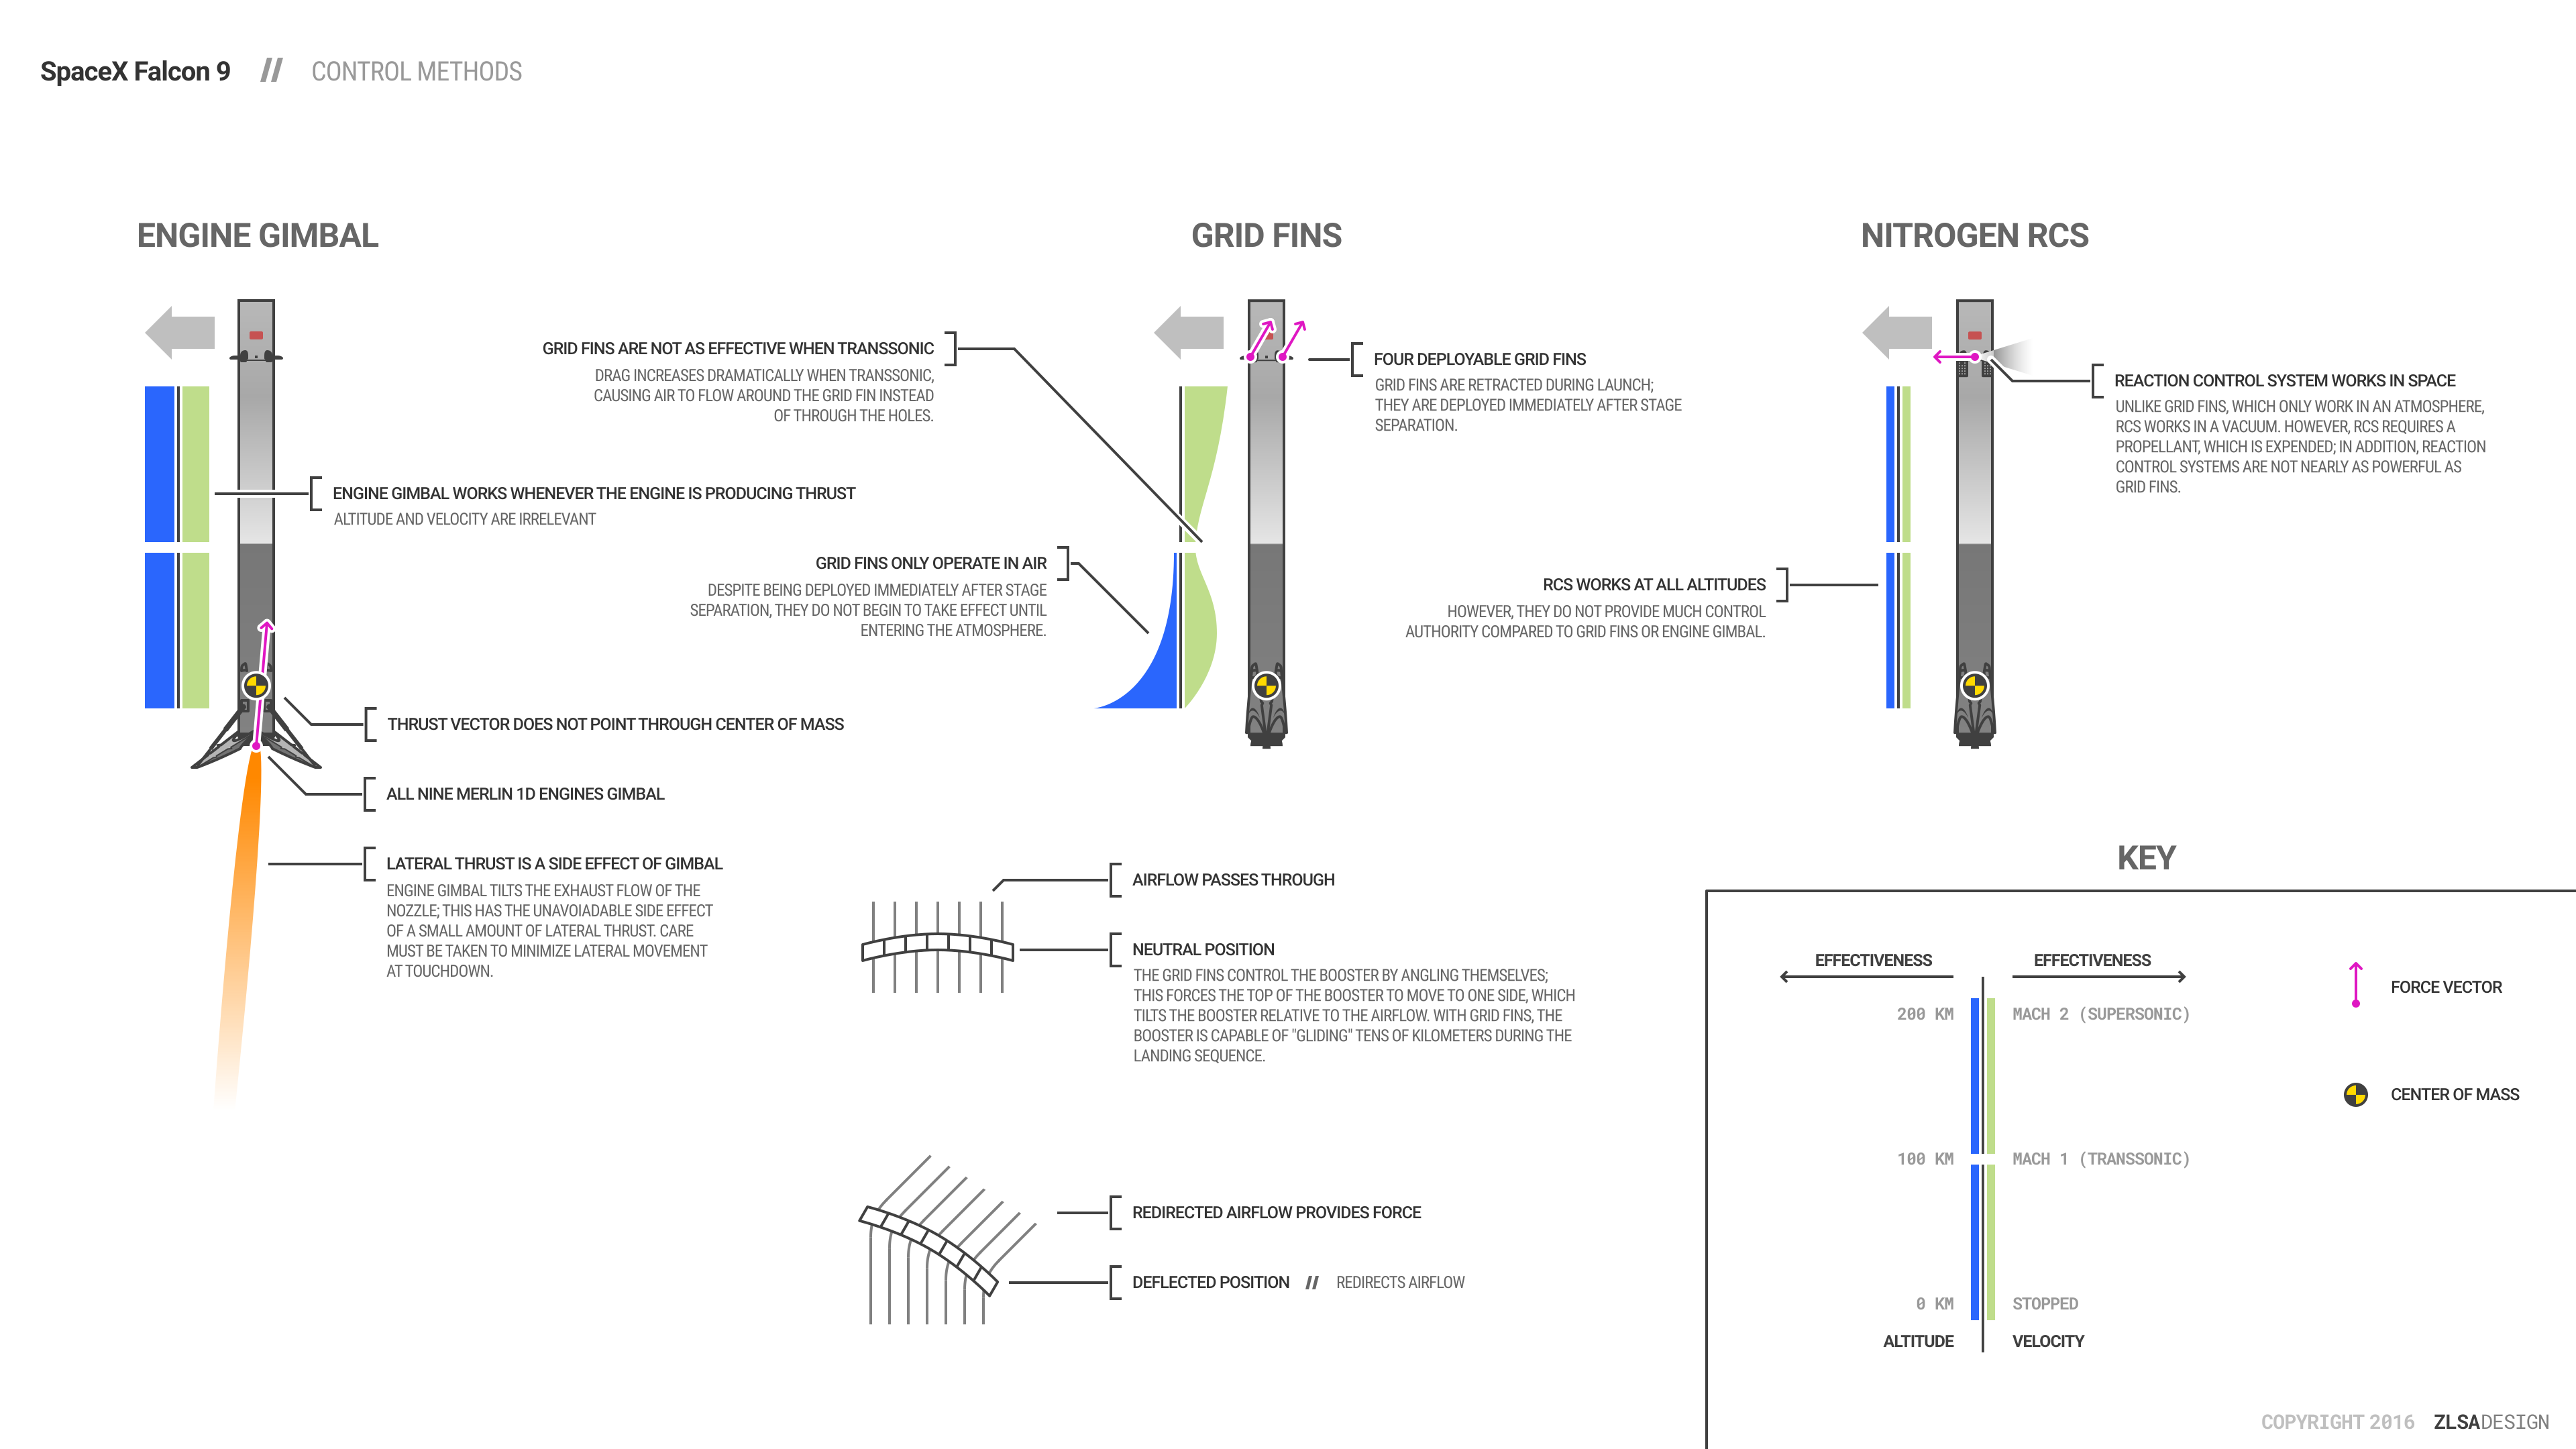
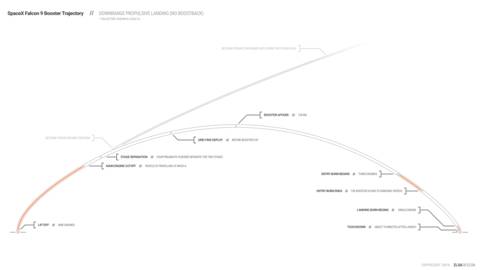
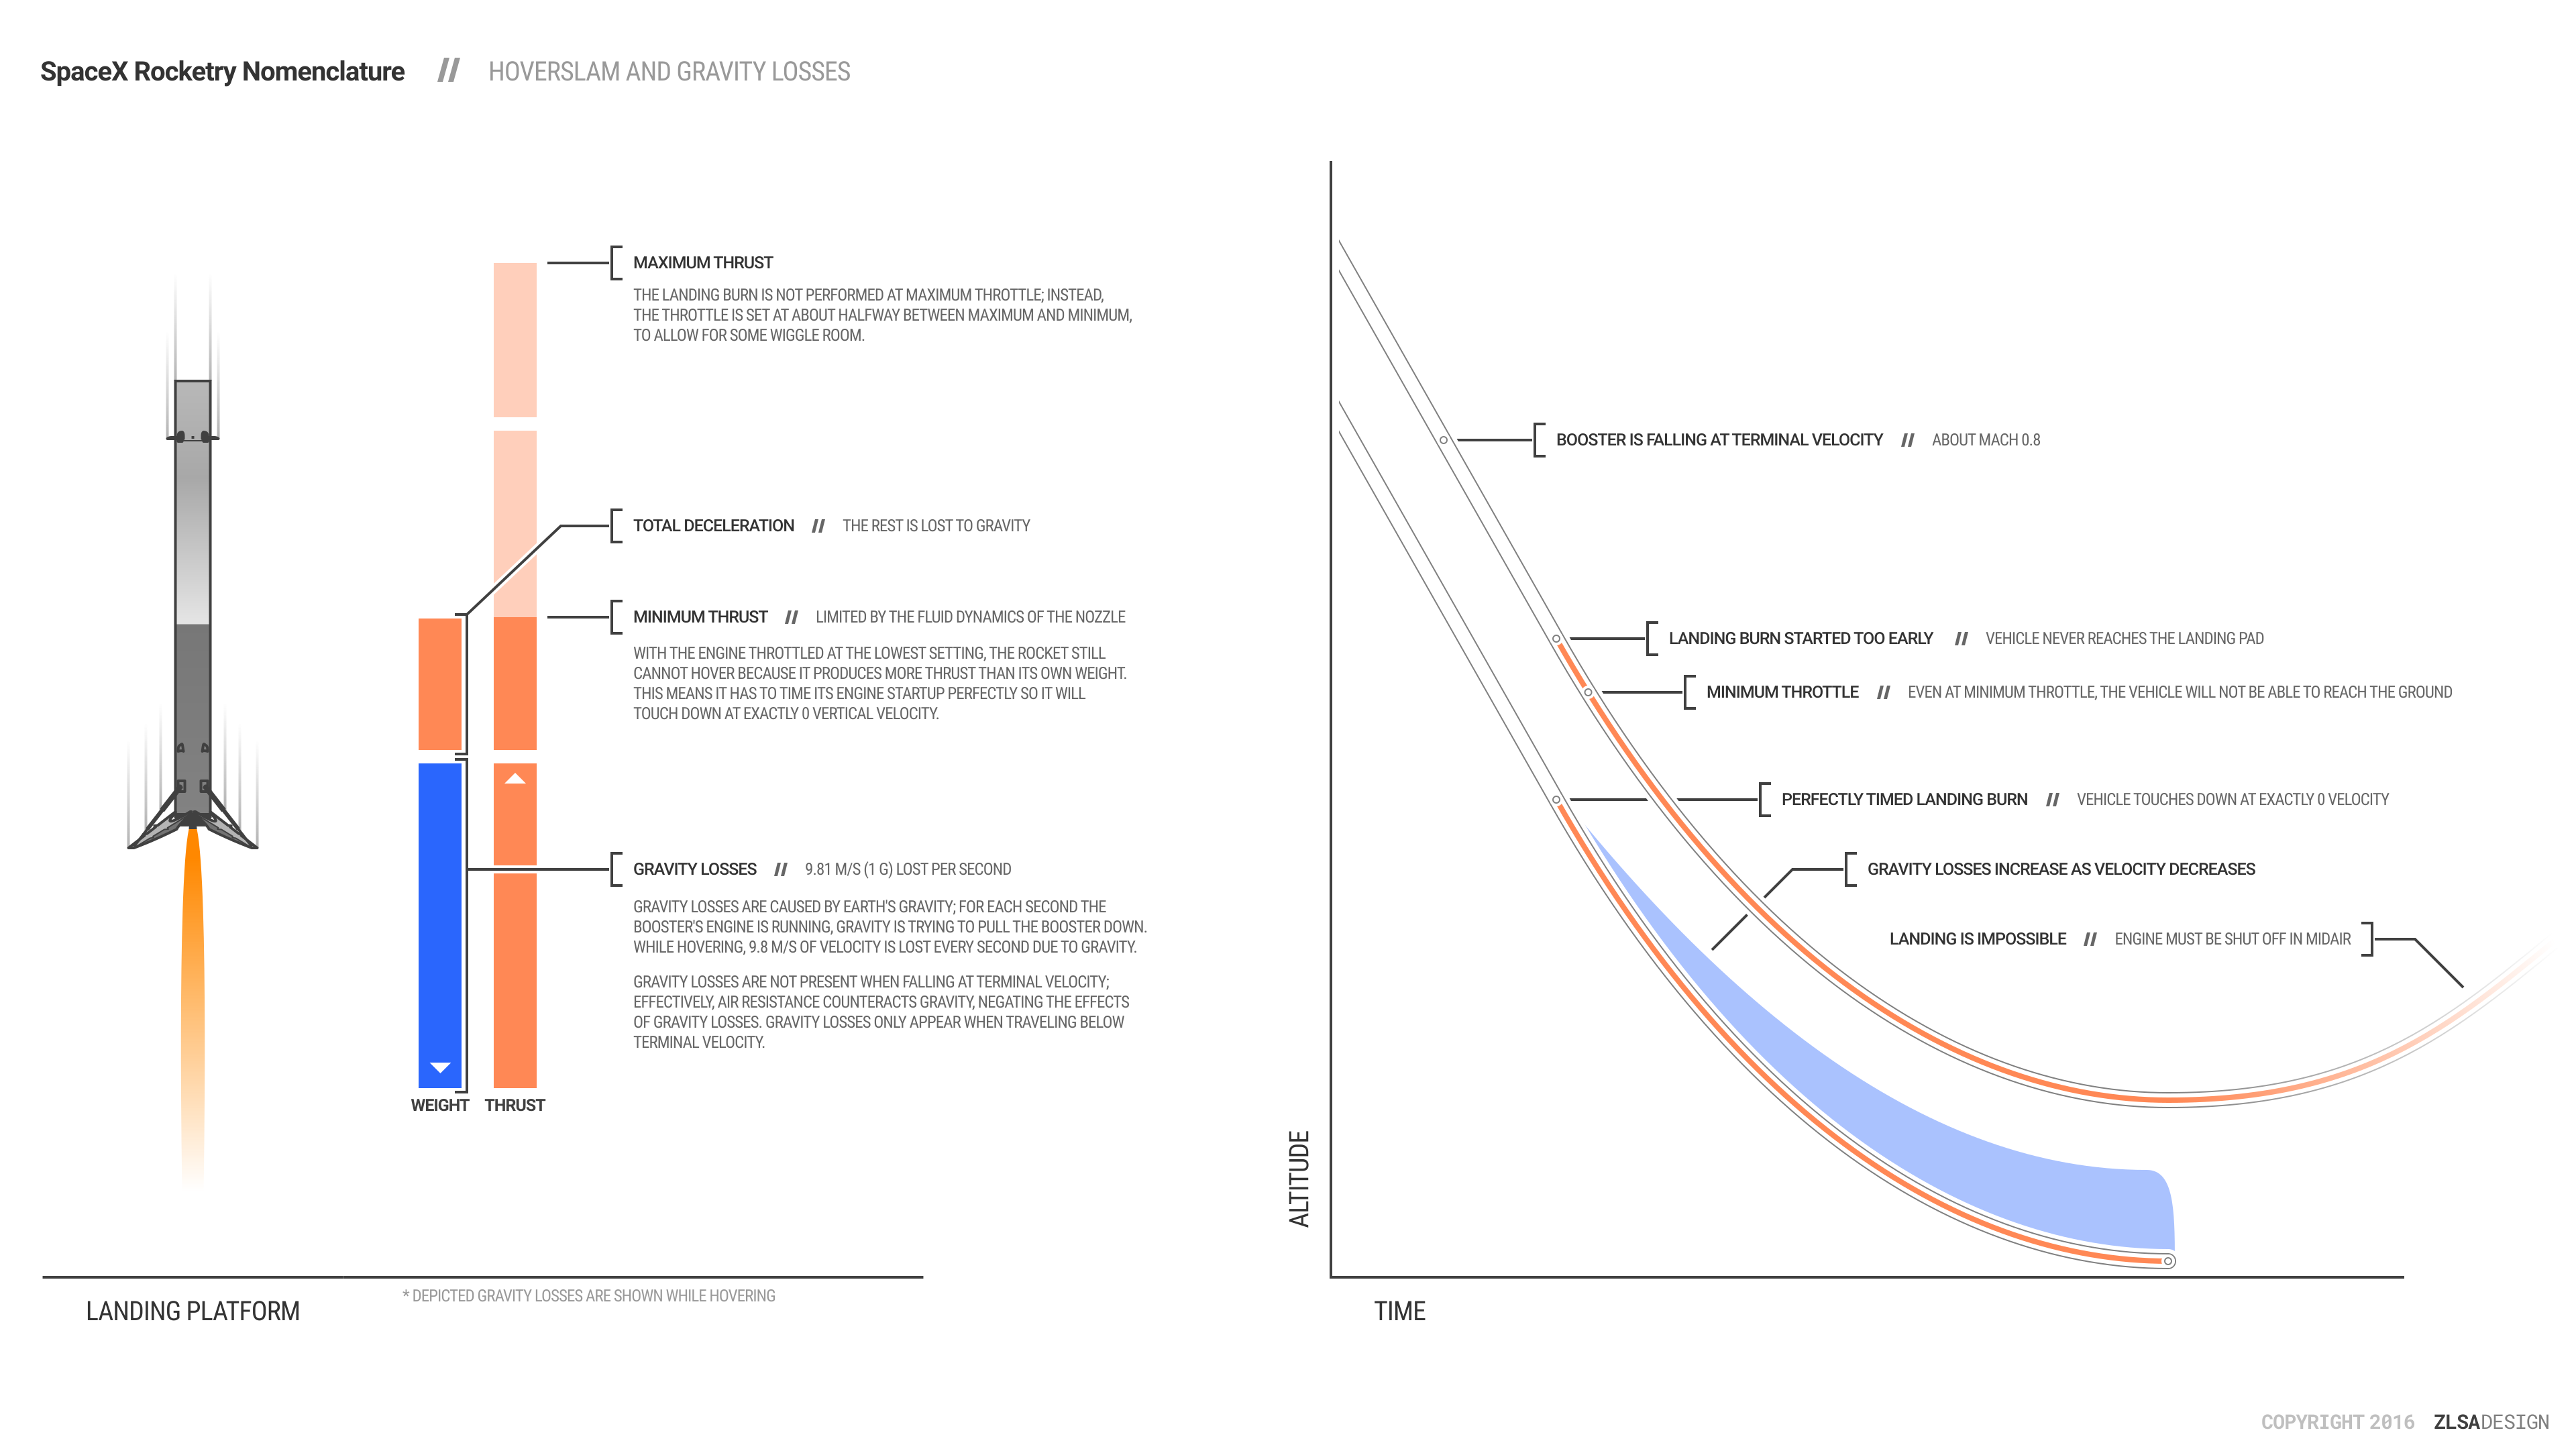
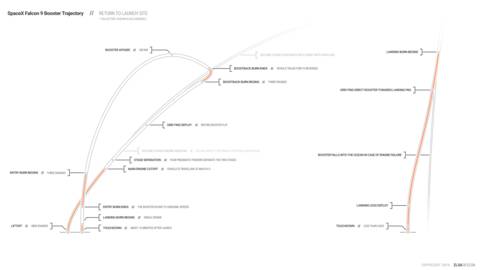
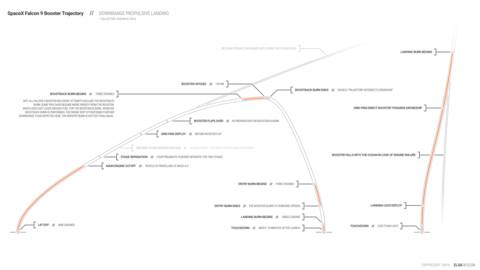
SpaceX Falcon 9 Reaching Orbit
 Direct link
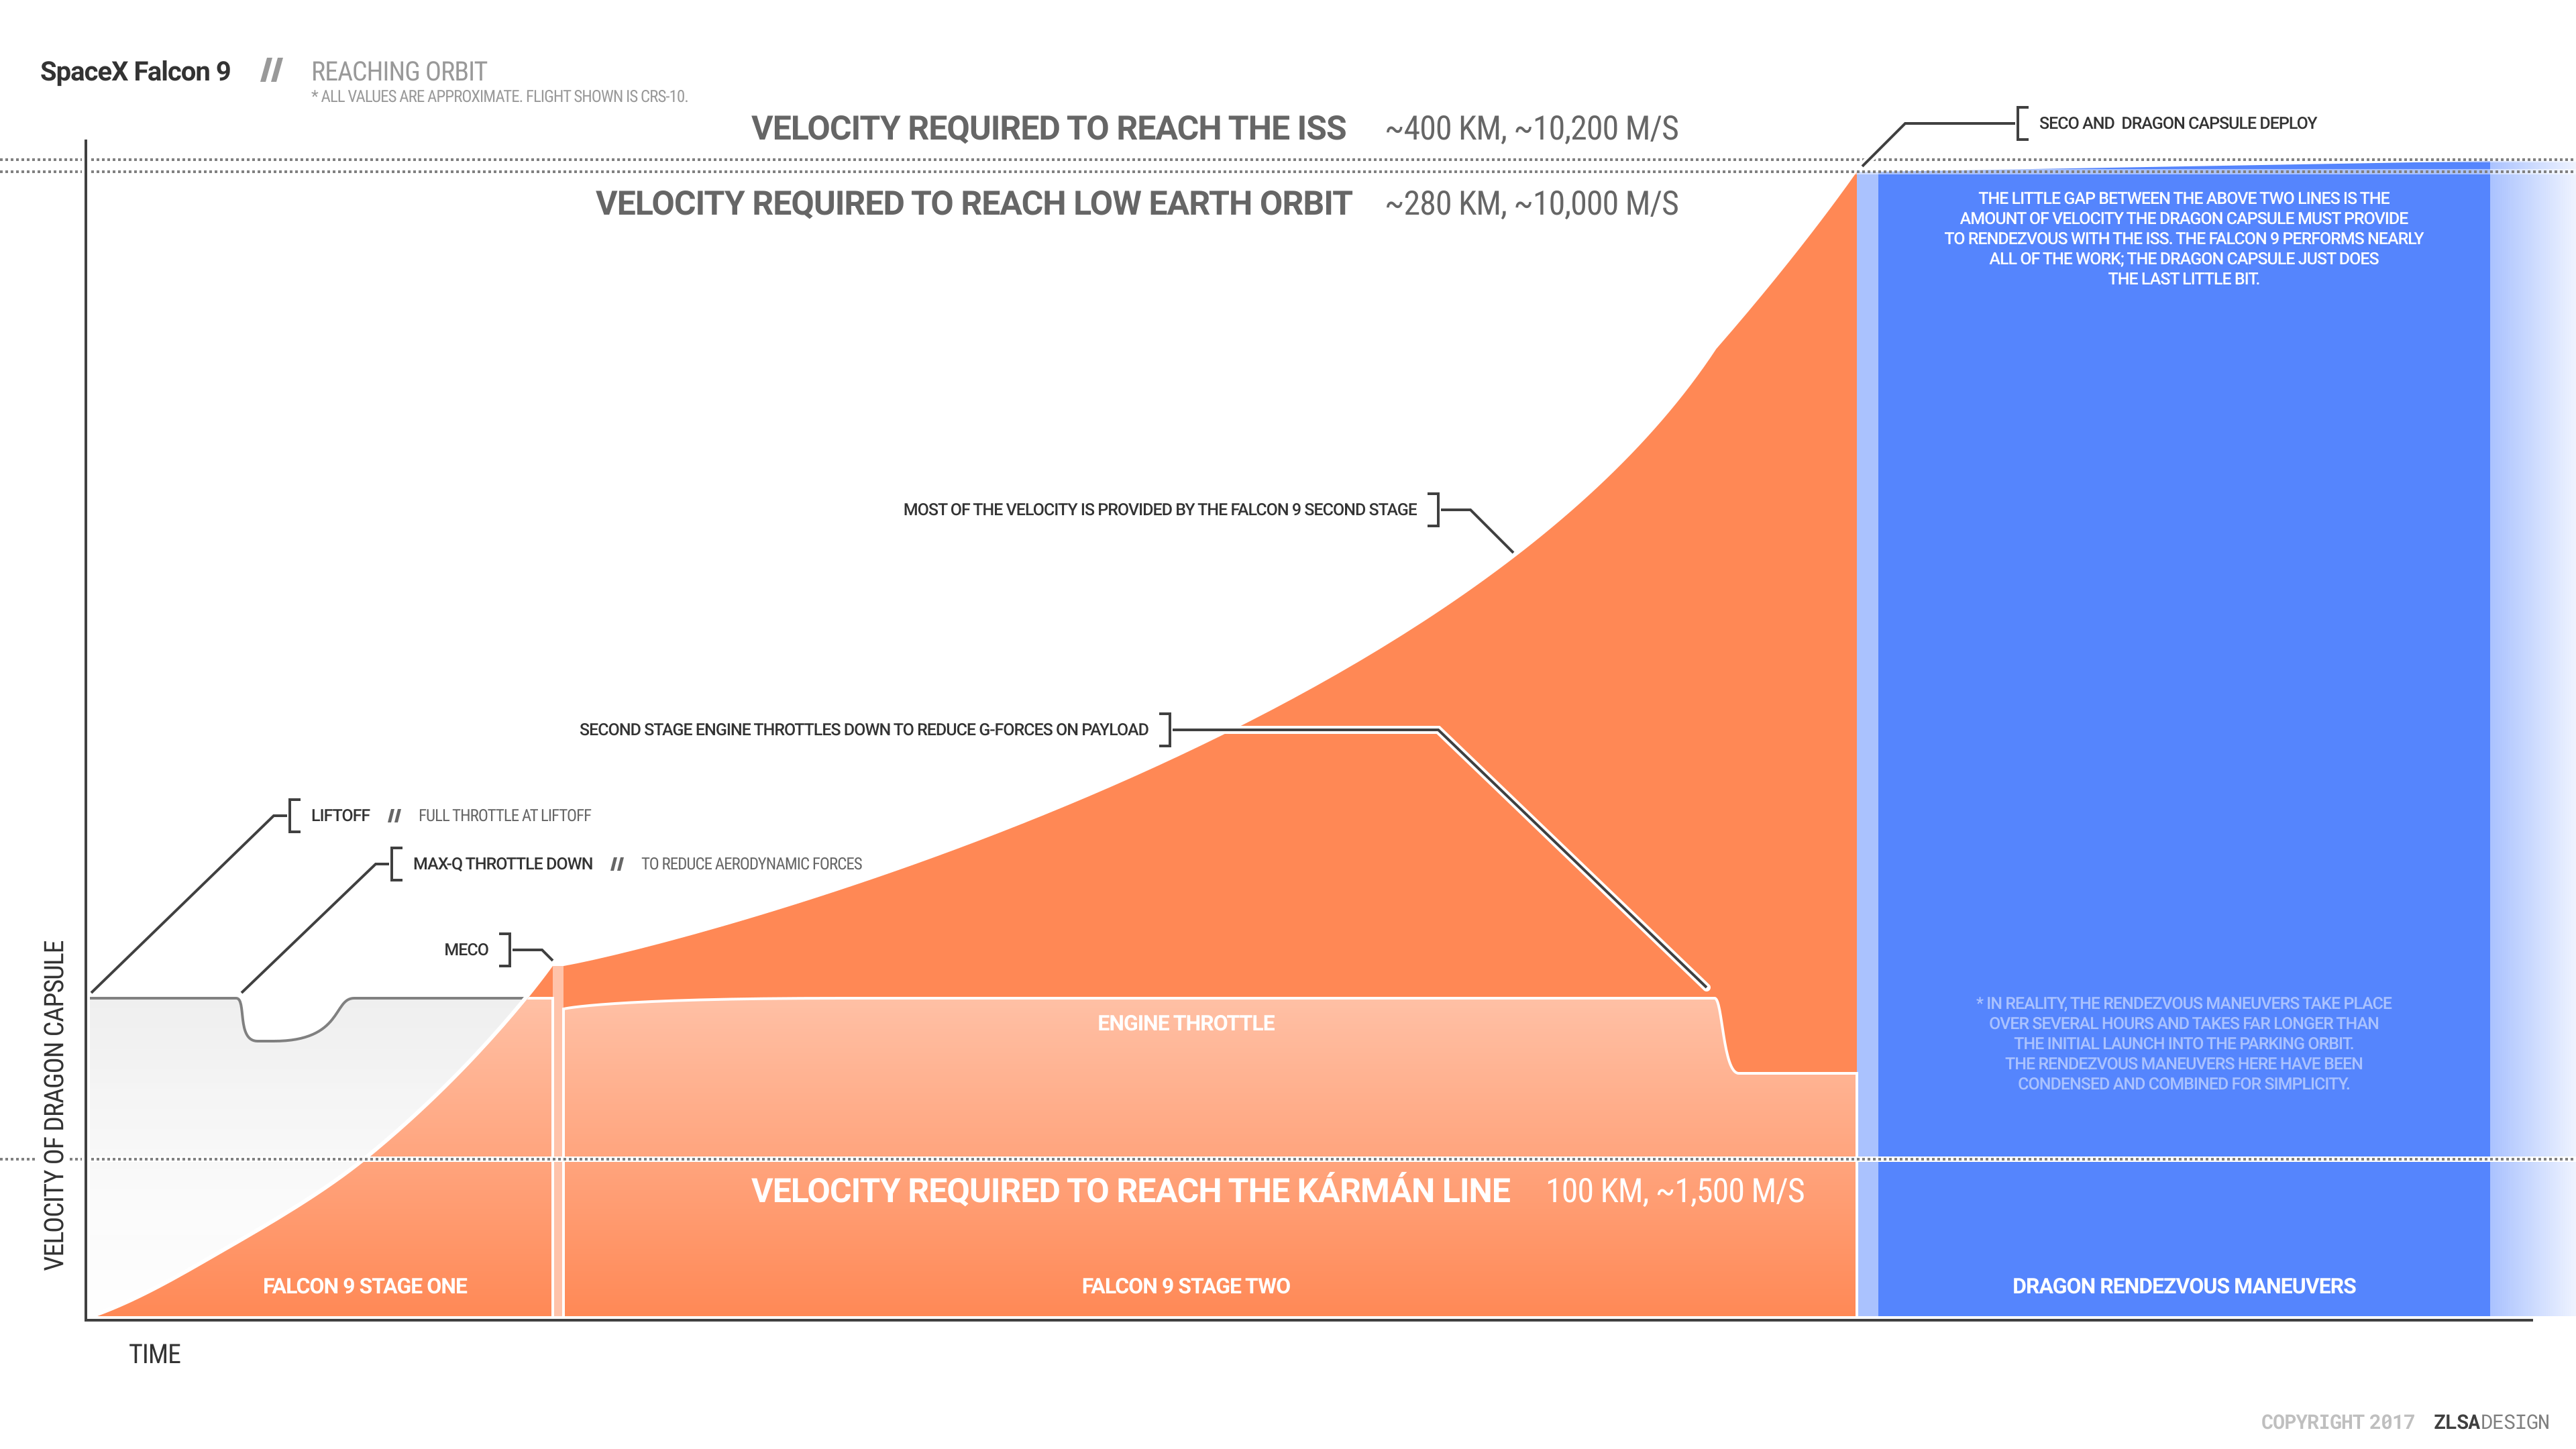
This is a visualization of how much velocity the SpaceX Dragon capsule gains from the SpaceX Falcon 9 booster during a launch to the ISS.
Read more (1 min)