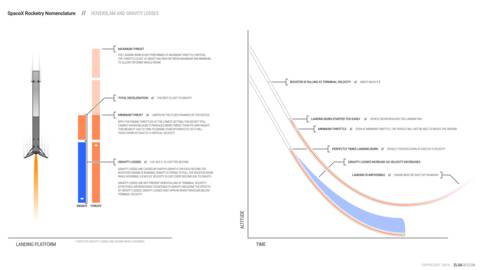
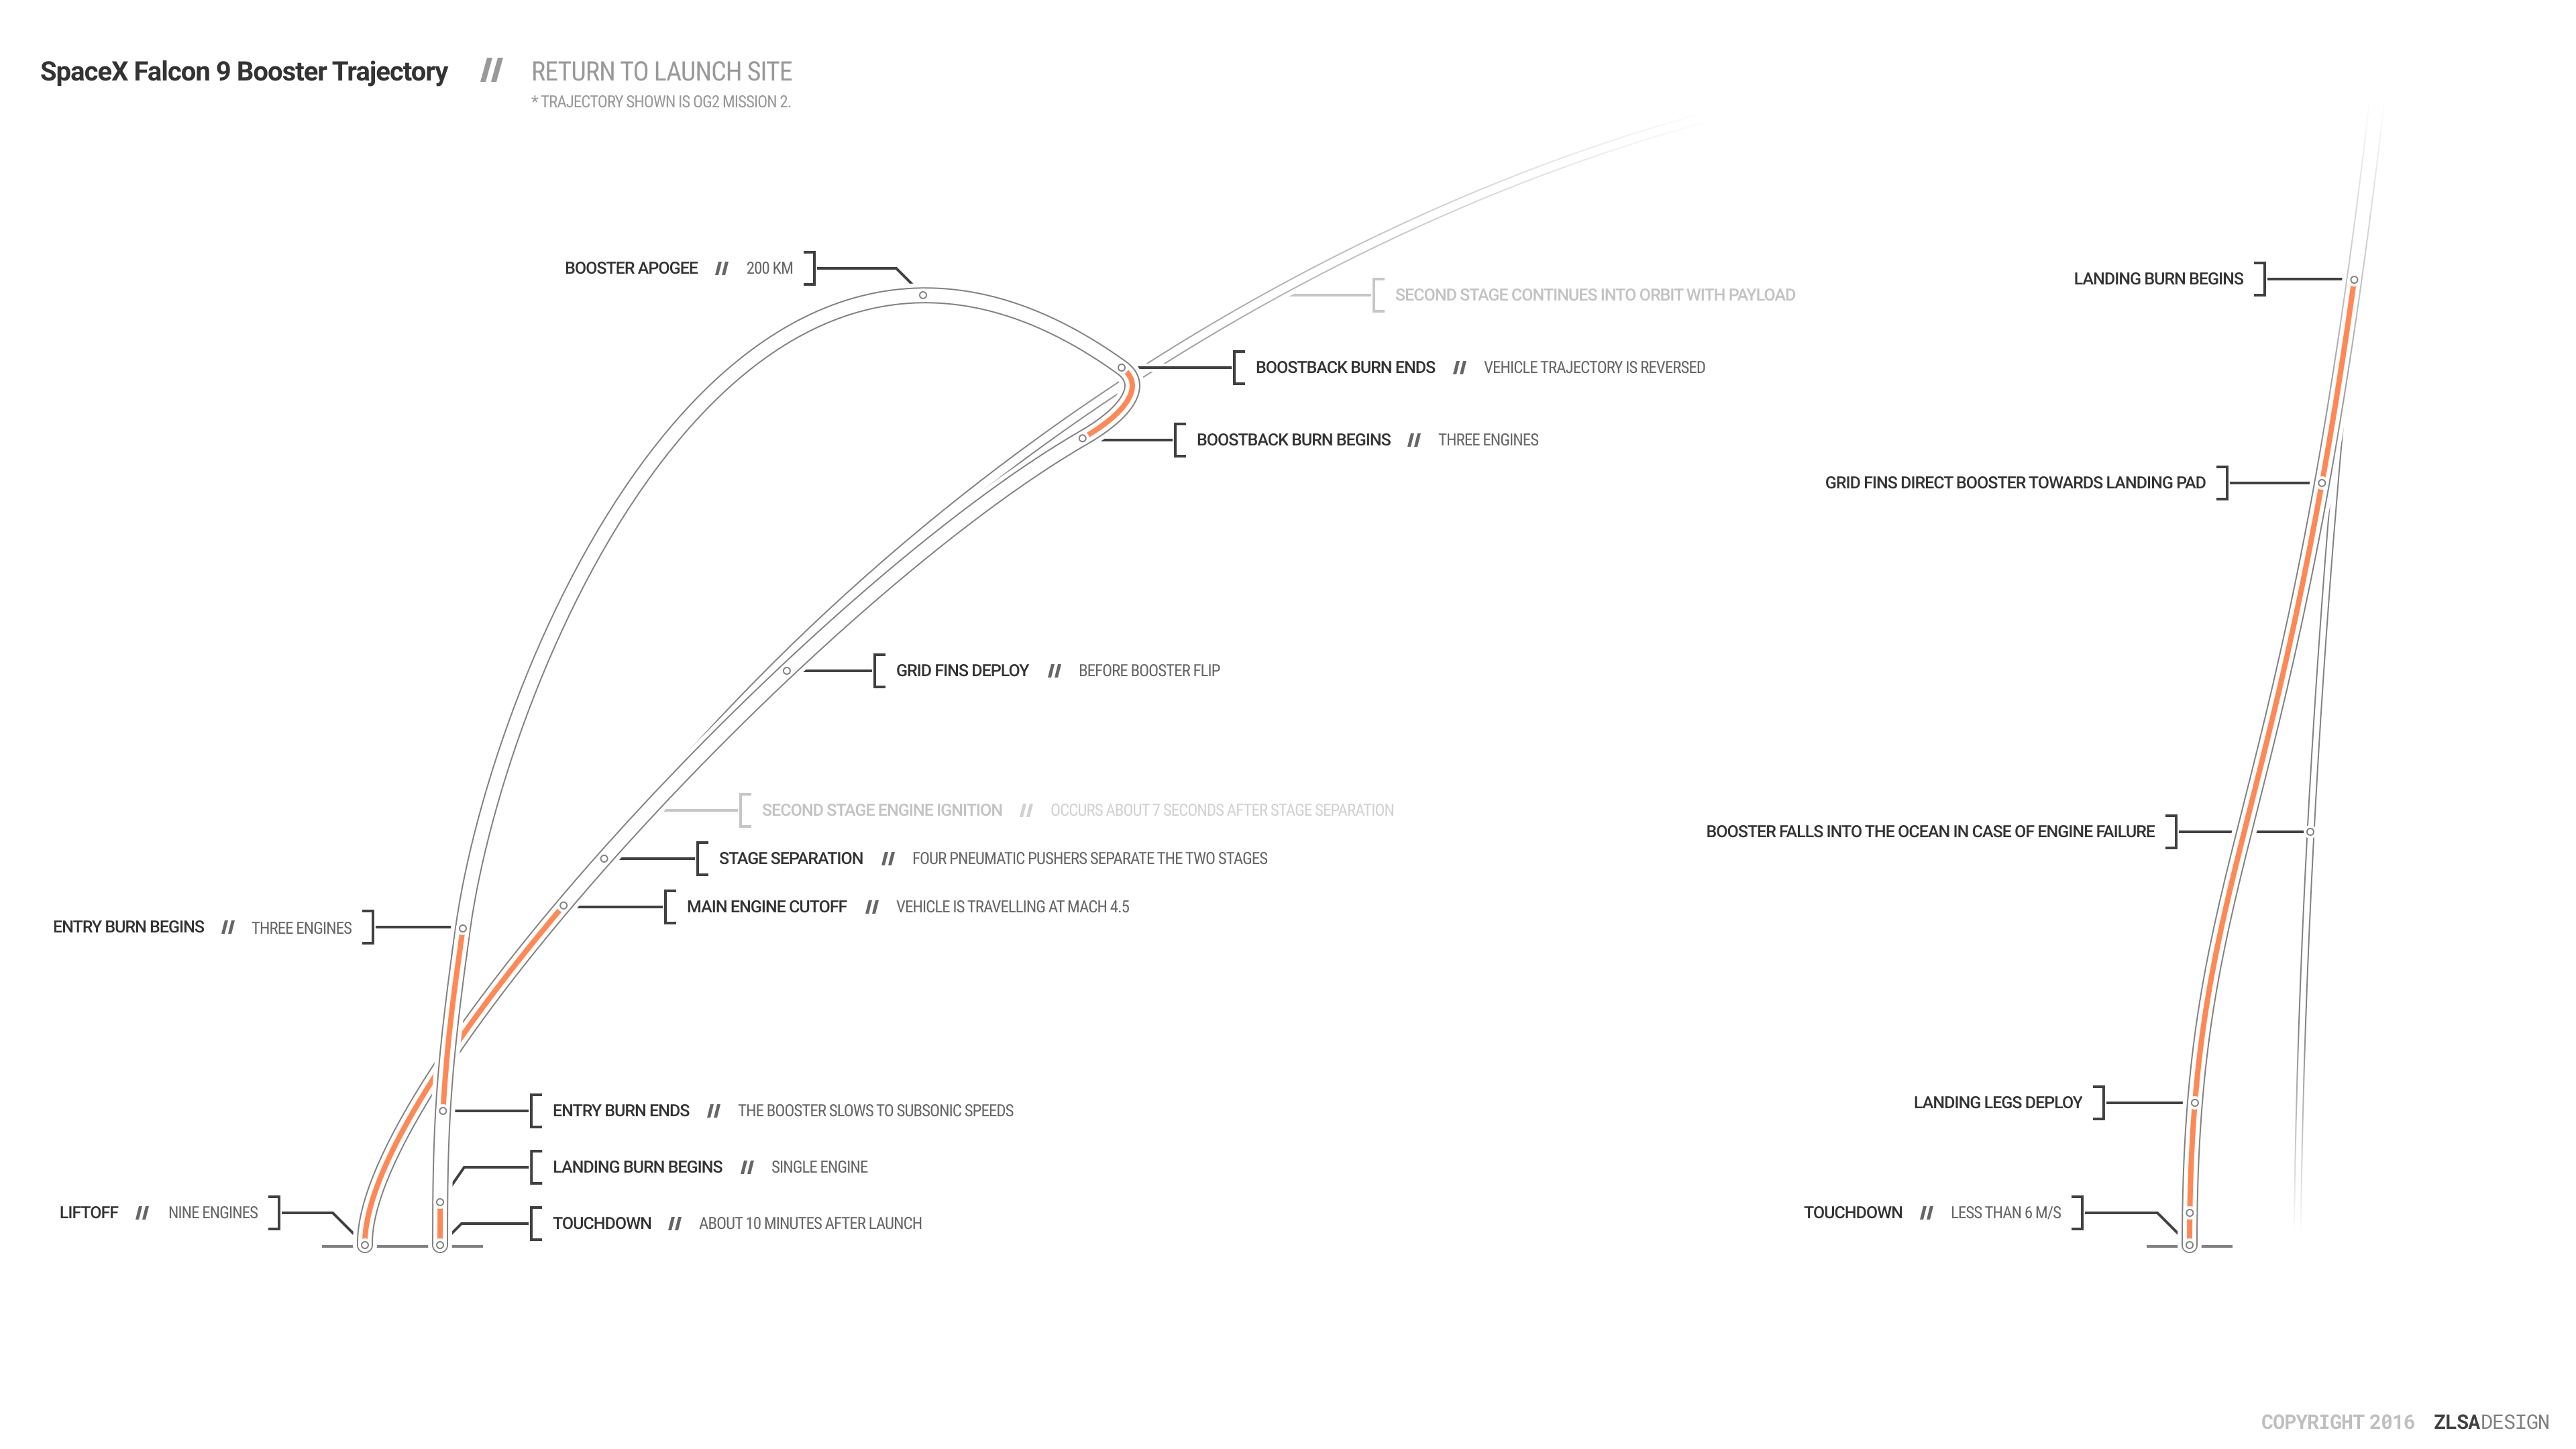
infographic
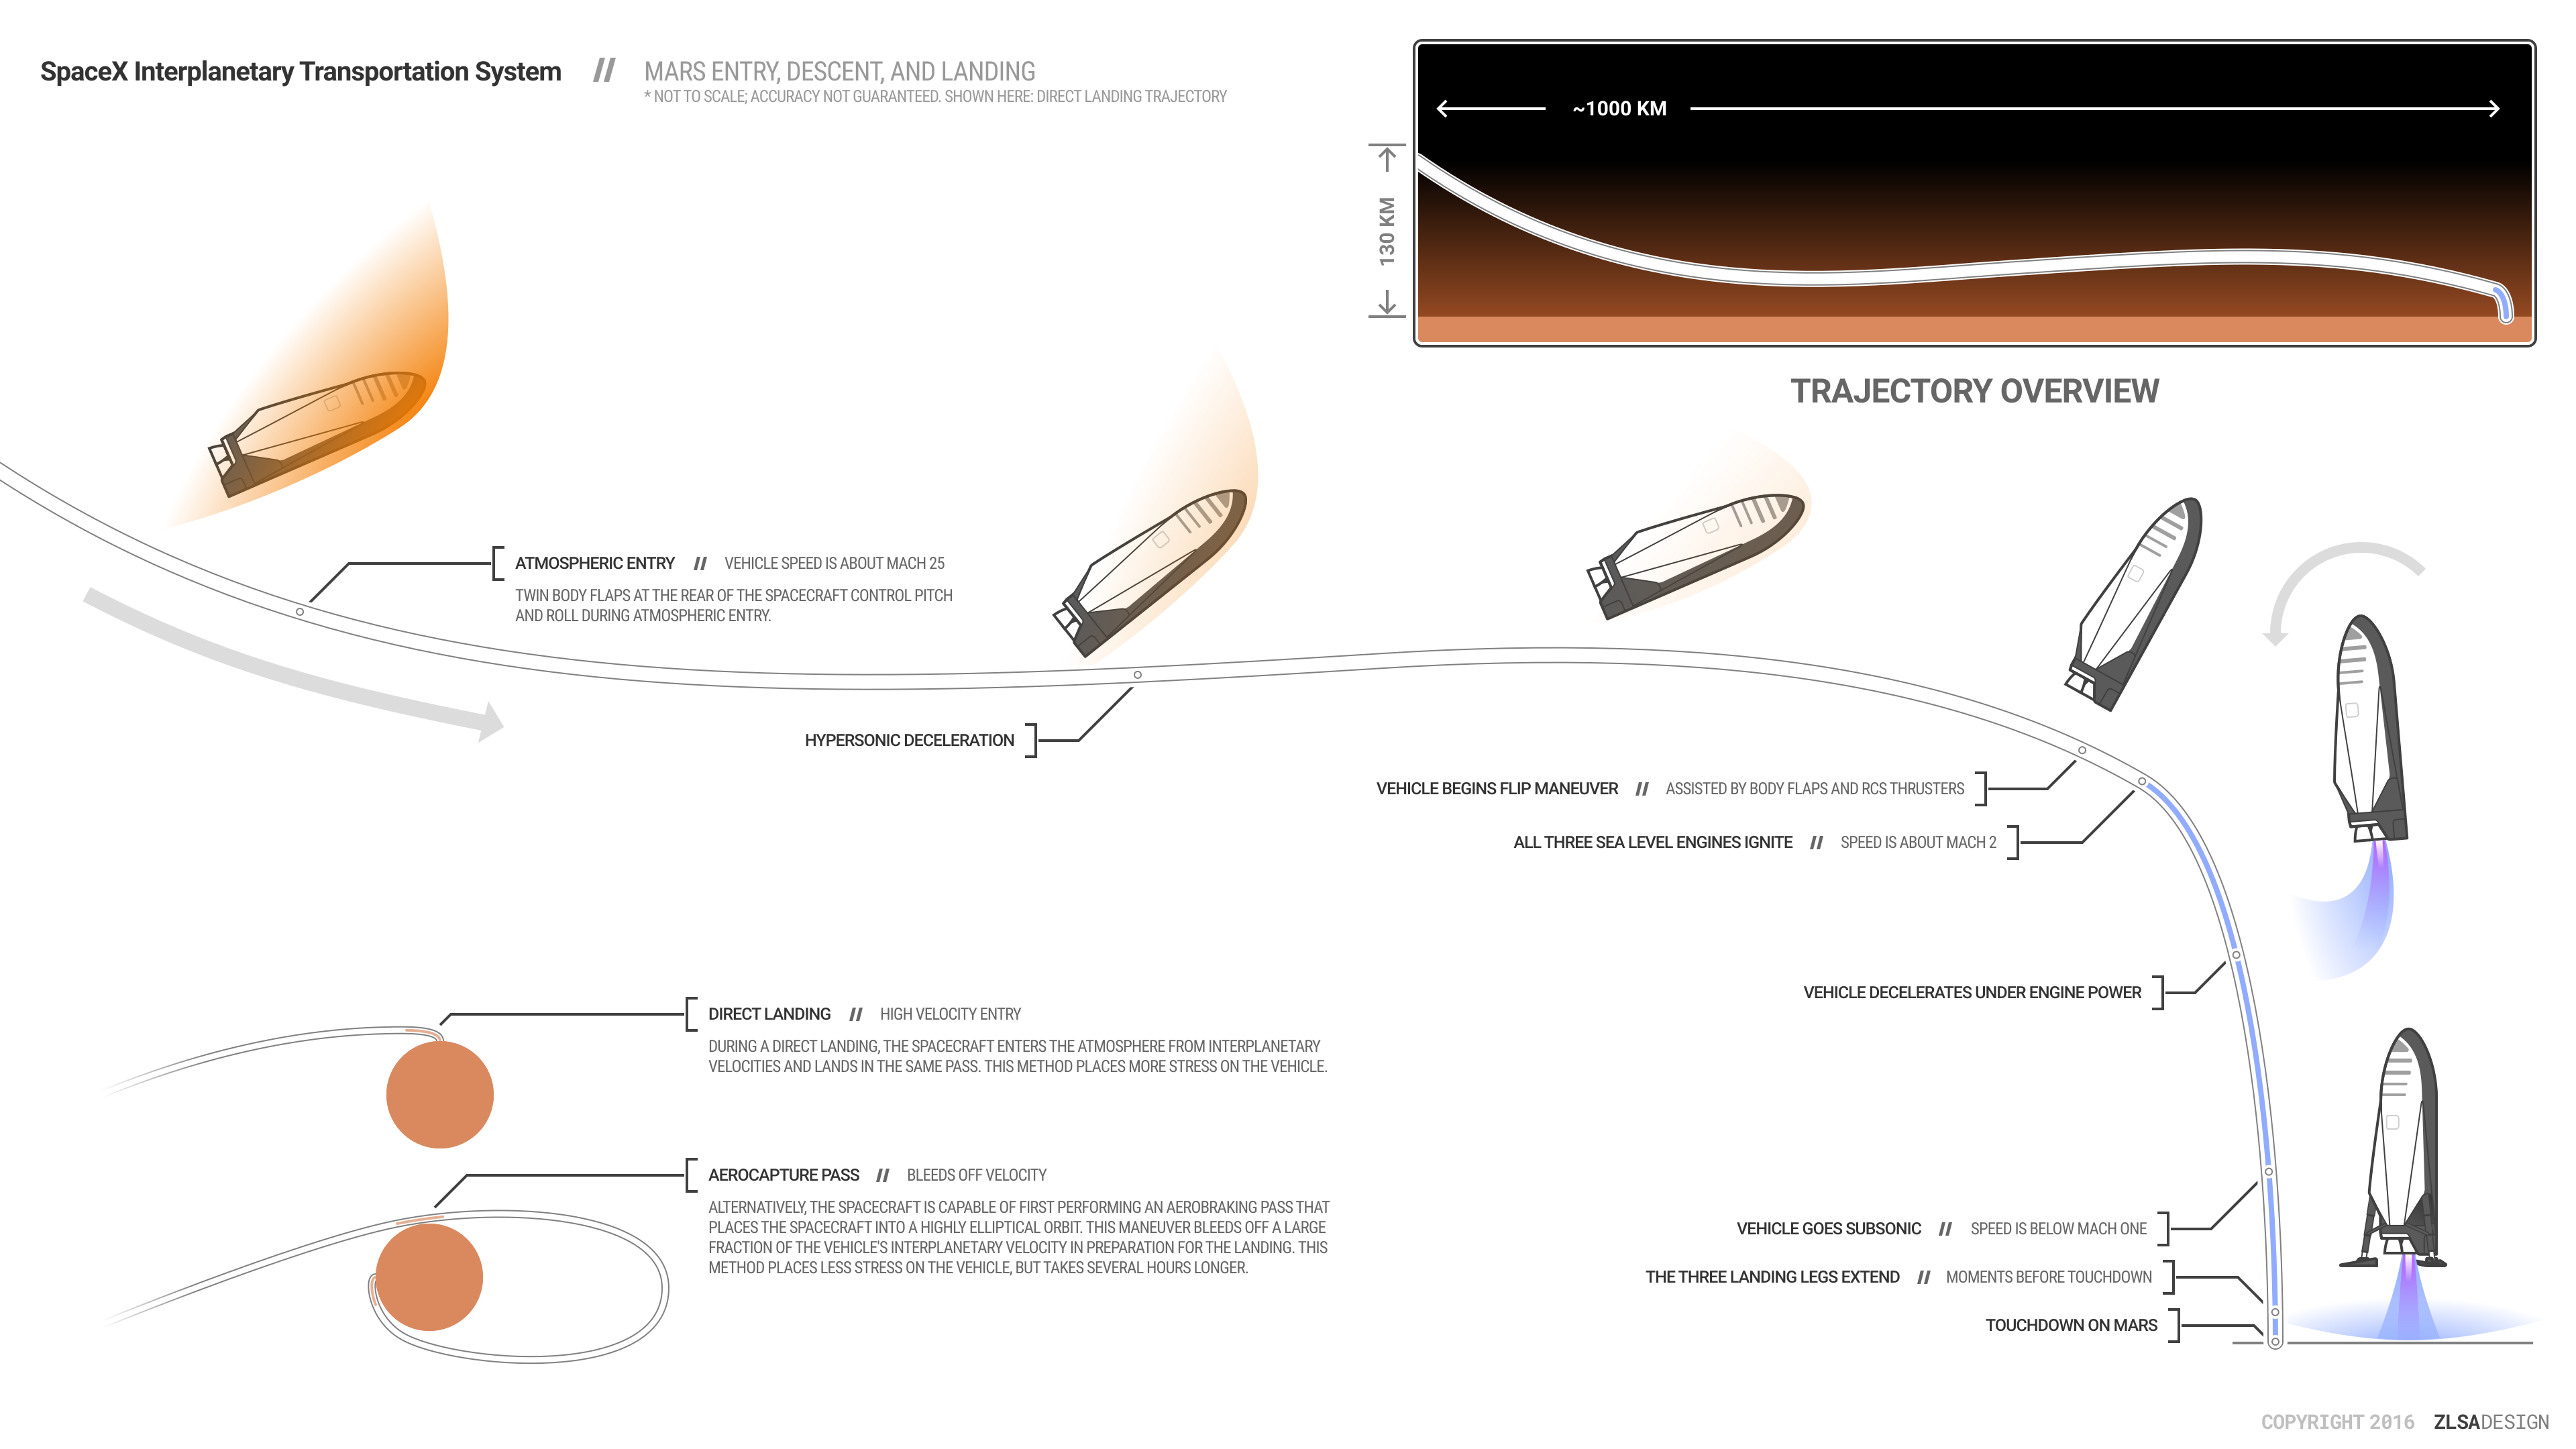
SpaceX Dragon 2 Landing
 Direct link
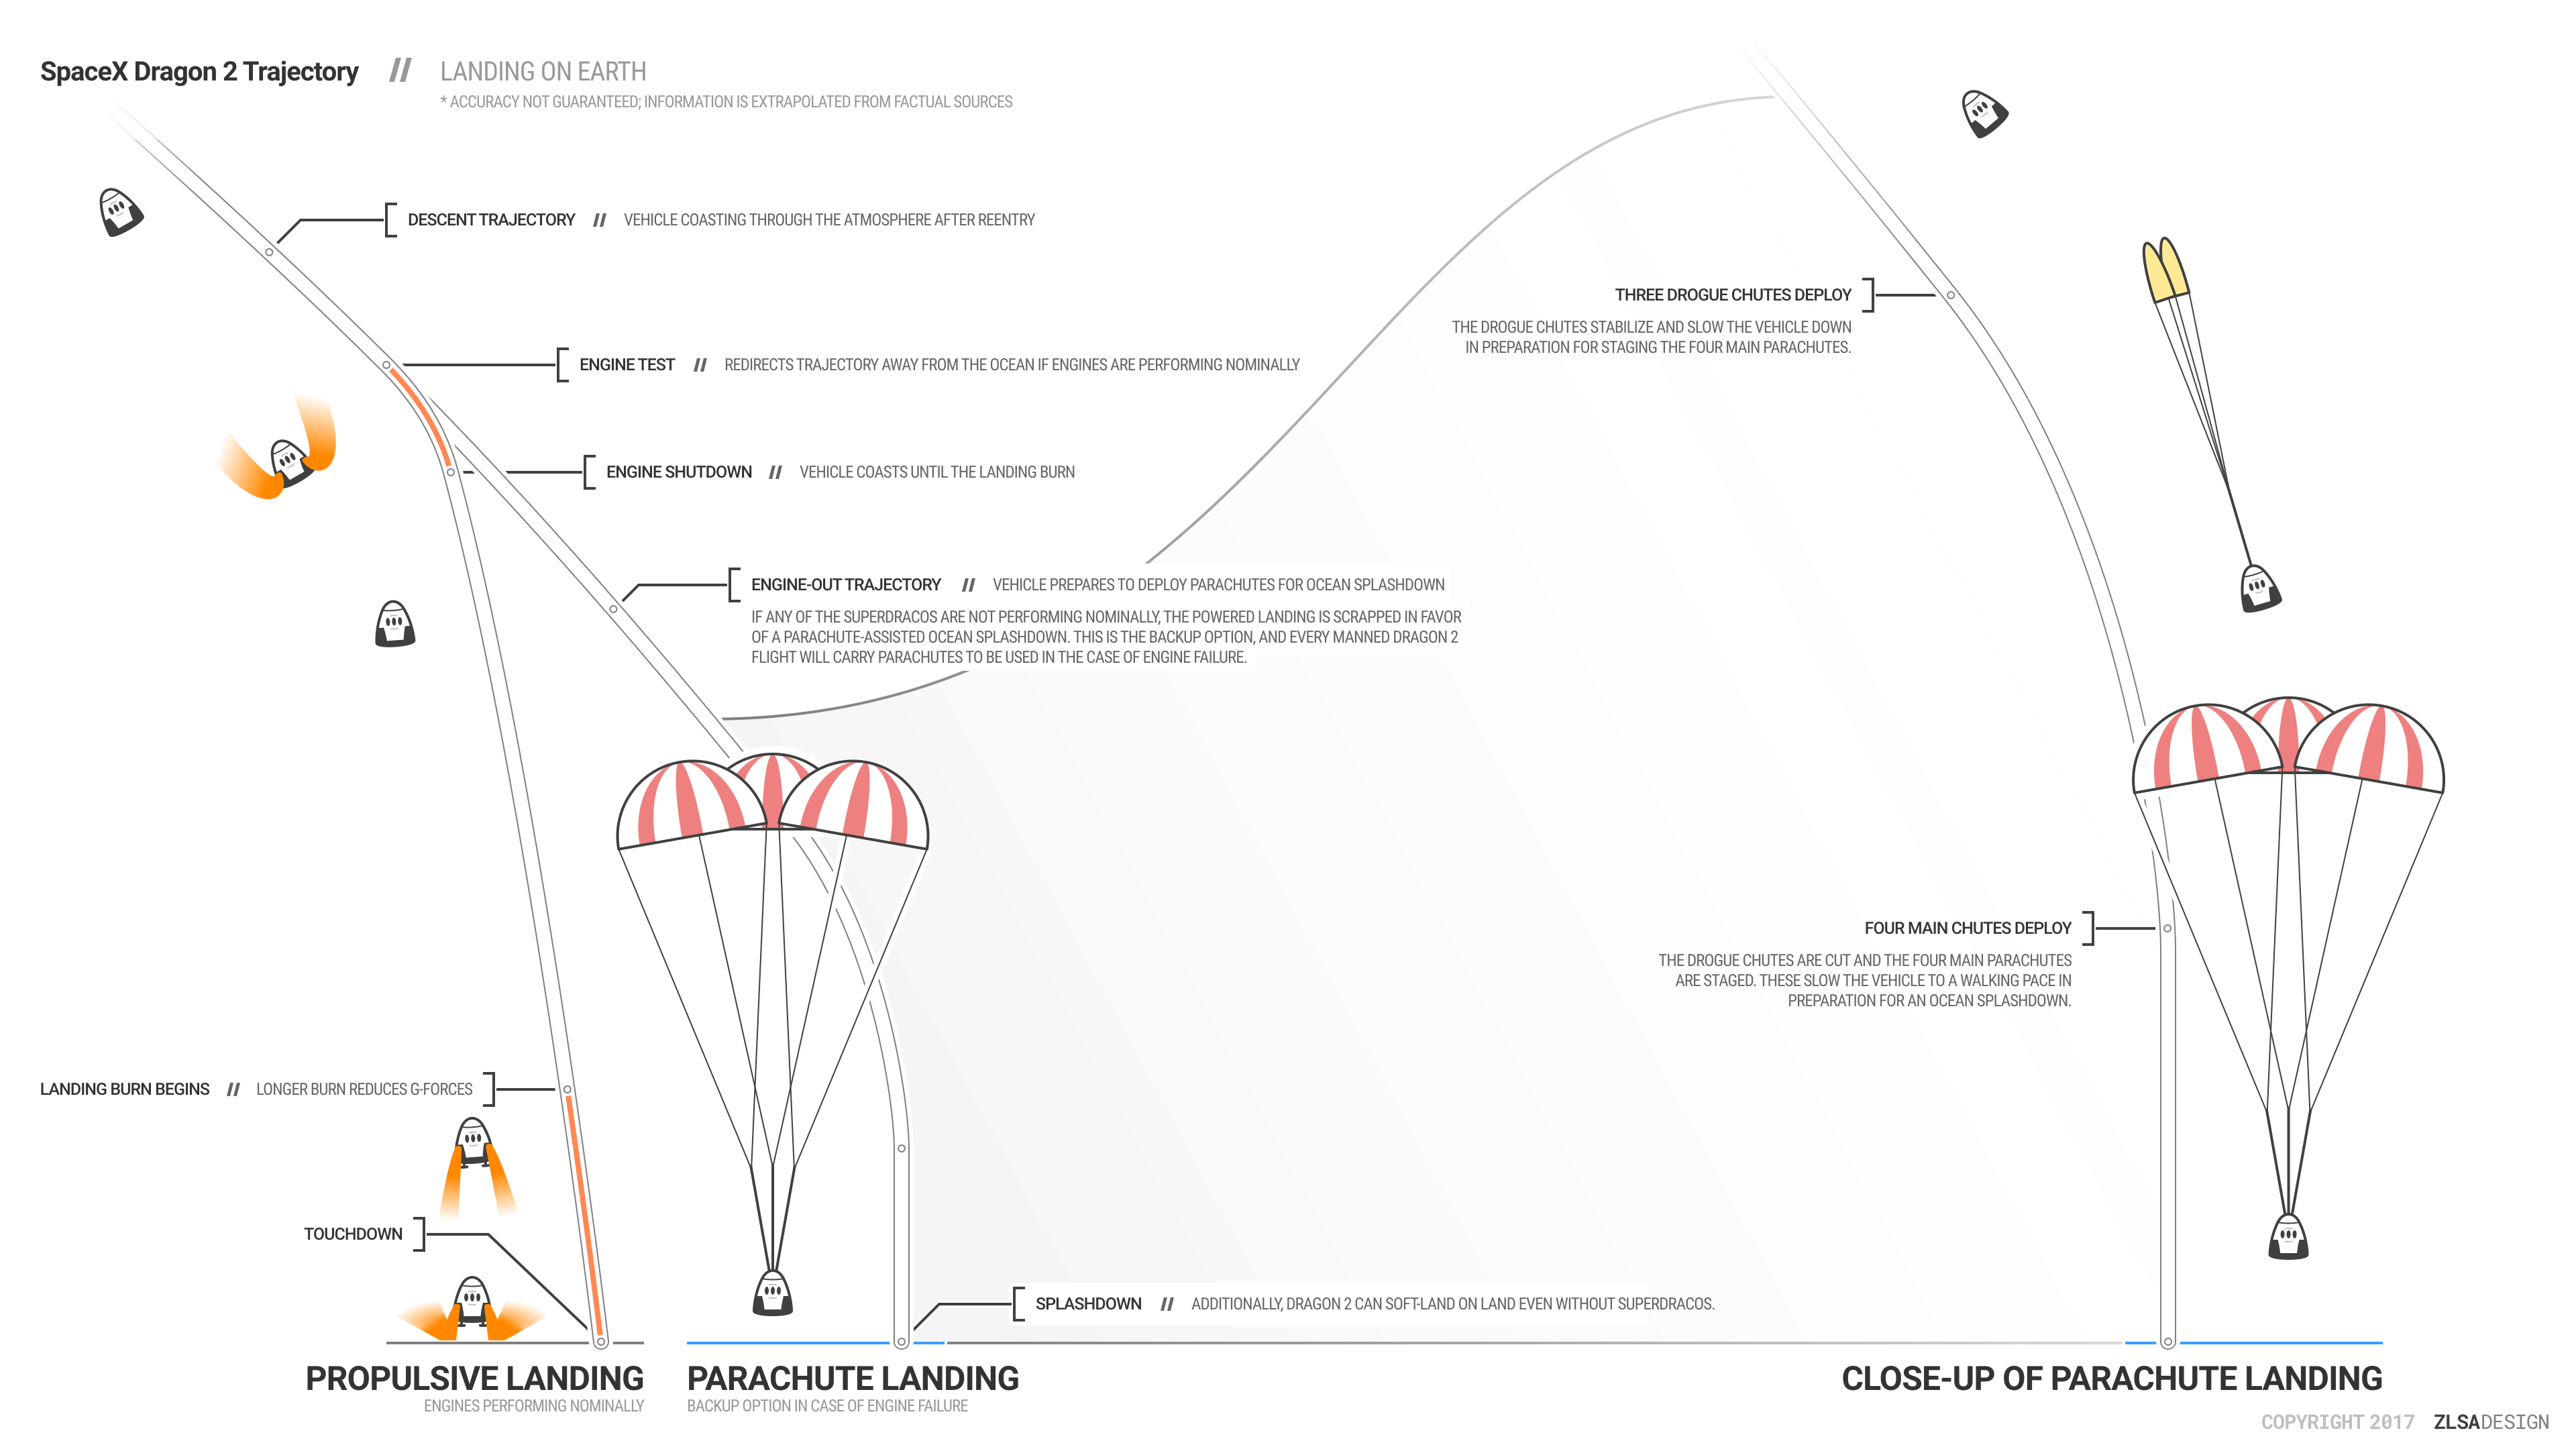

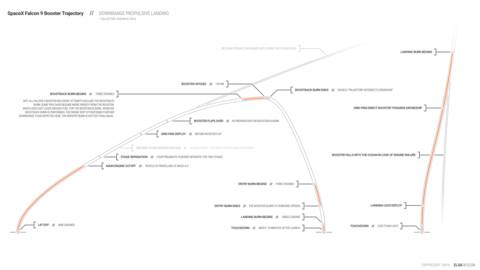
This is the approximate trajectory of the SpaceX Dragon 2 as it lands on Earth after a trip to the ISS.